
Lead capture
Lead capture is the email gate that turns a widget interaction into a contact in your sub-account on the platform. It’s the foundation everything else builds on: once a contact exists and is tagged, your workflows and email campaigns can take over.
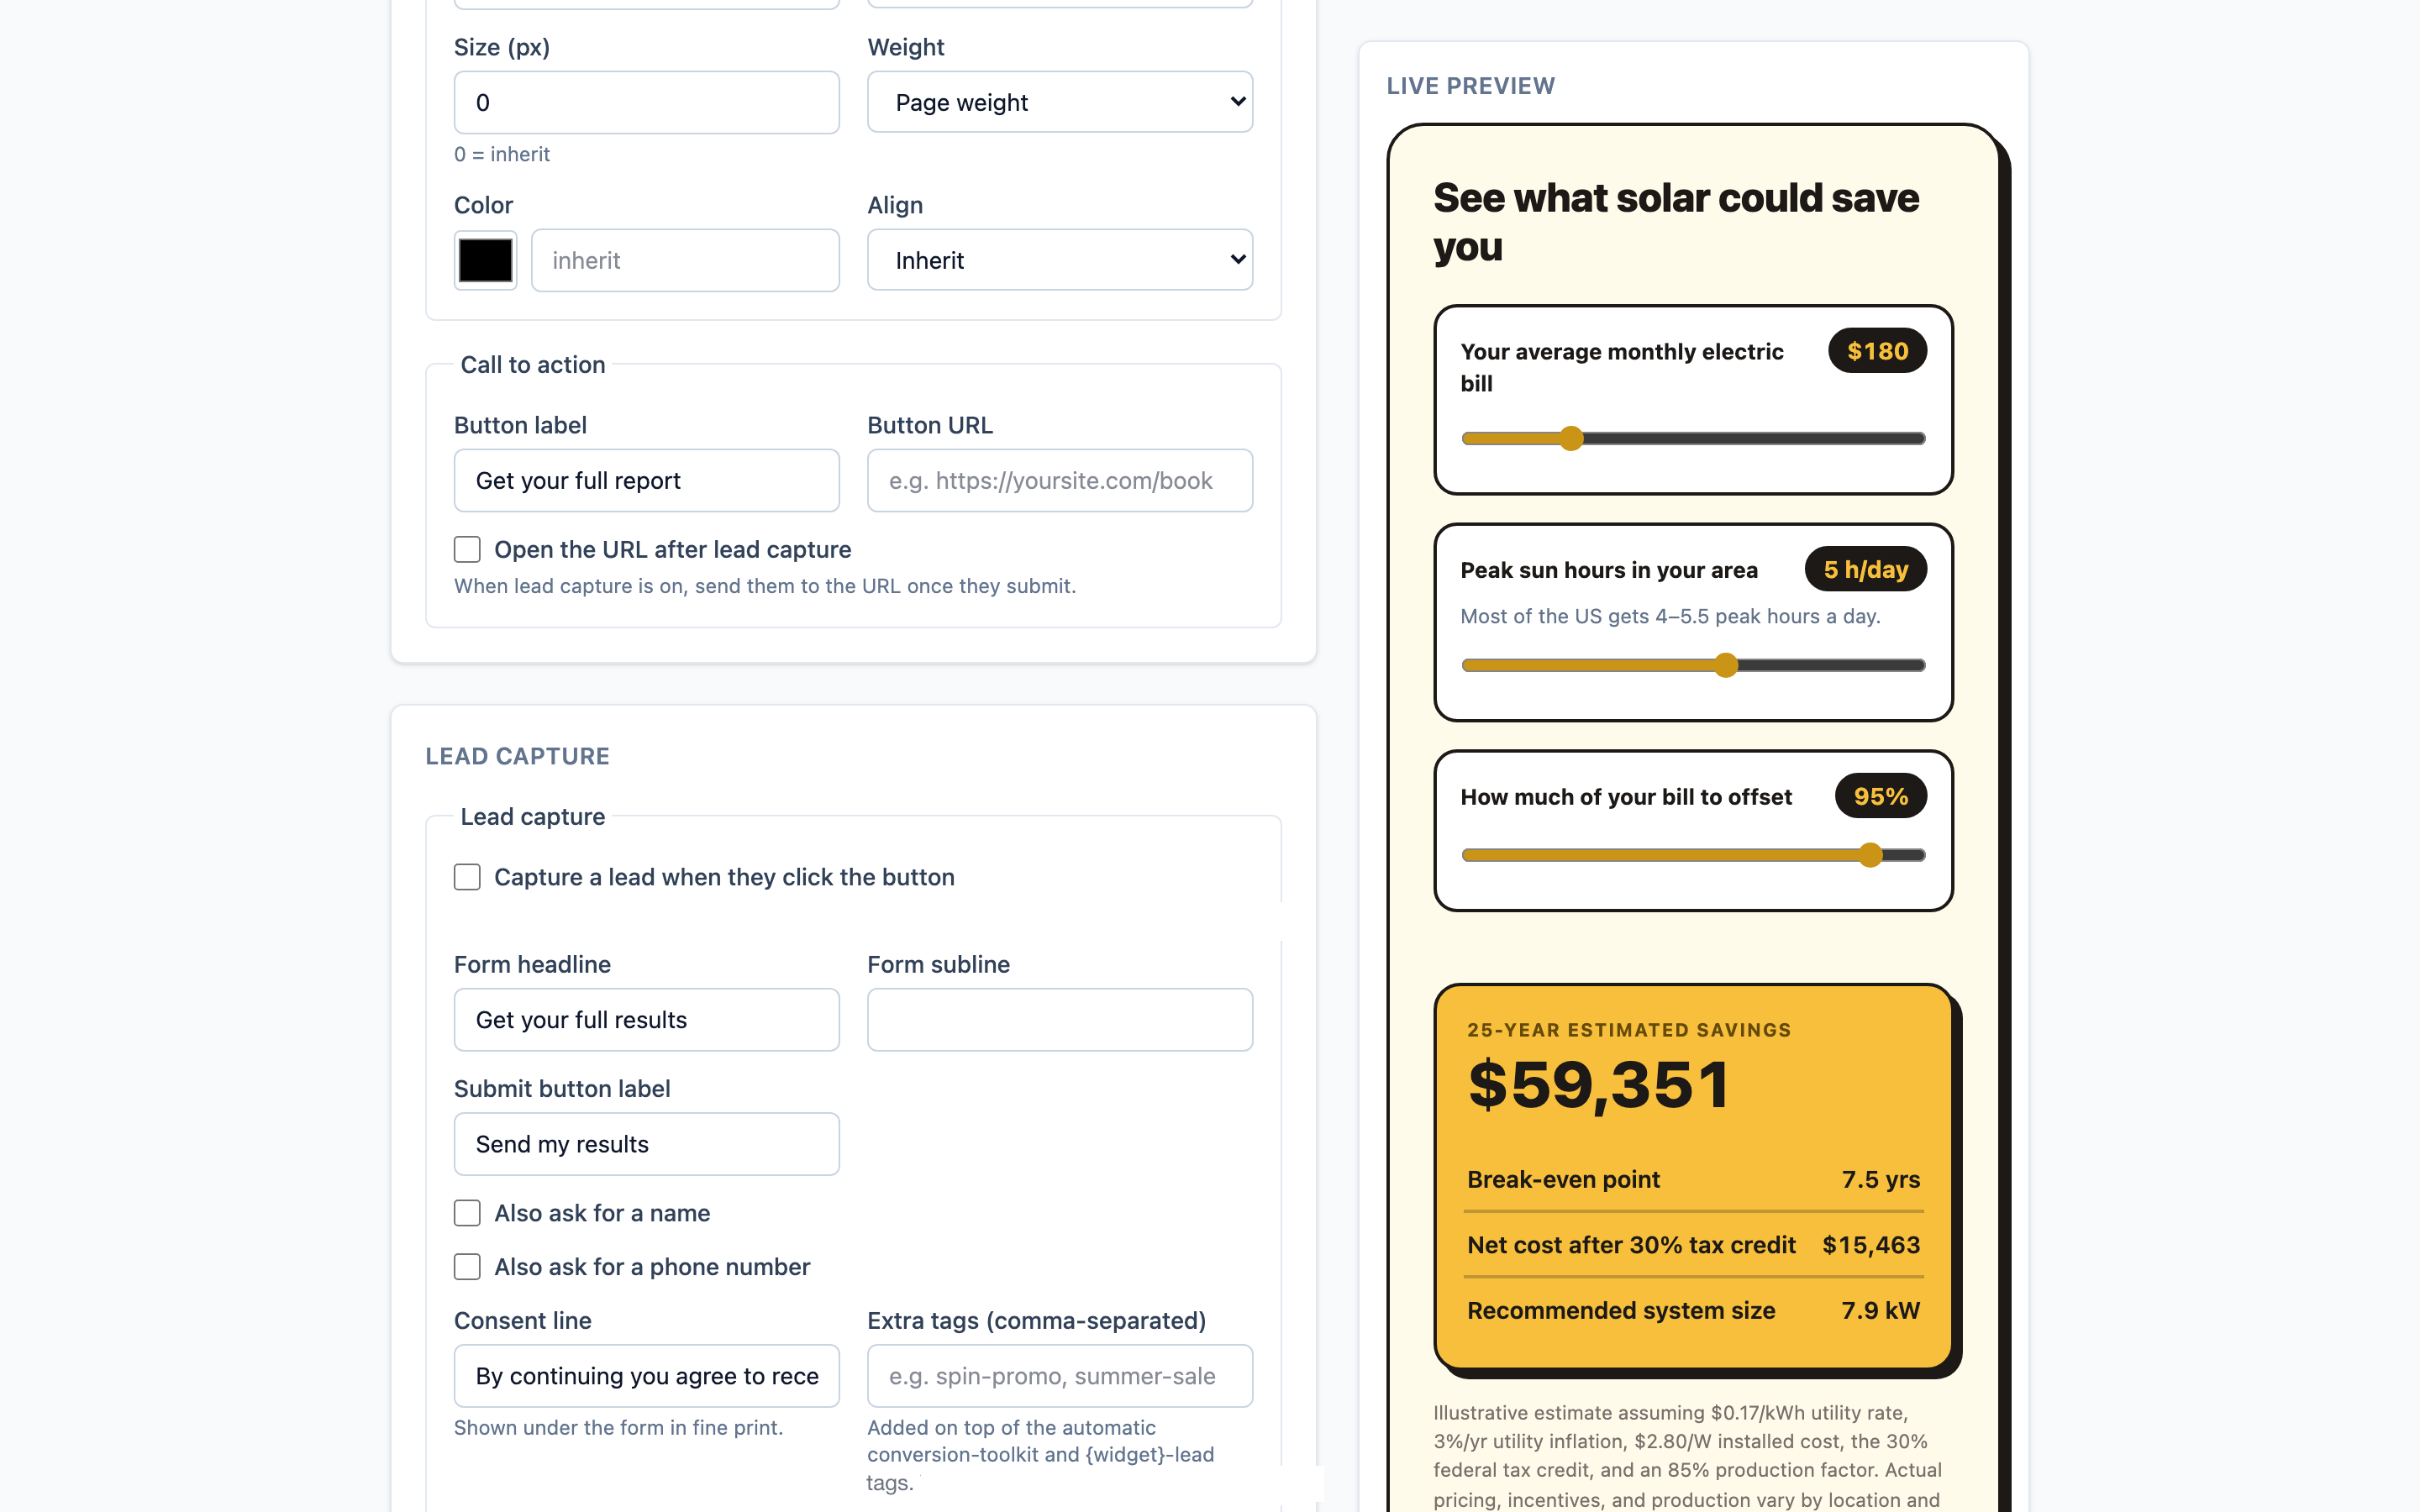
What gets written to the contact
When a visitor submits the gate, Conversion Toolkit upserts a contact (creates a new one, or updates the existing one with that email — never a duplicate) and decorates it:
| What | Always? | Detail |
|---|---|---|
| Contact (email, optional name & phone) | ✅ | The contact’s Source is set to the widget’s name |
| Tags | ✅ | Automatic tags + your own — see Tags & custom fields |
| A note | ✅ | A readable summary of the result/answers (e.g. the calculator’s numbers) |
| Custom-field values | Optional | Calculators only, when “Save results to CRM” is on |
Turn it on
New calculators, quizzes and spin-to-win wheels start with lead capture switched on. New calculators also save their results to CRM custom fields by default. To change it on any widget:
- Open the widget in Conversion Toolkit and find the Lead capture section.
- Tick or untick Capture a lead… (the exact label depends on the widget).
- Set the form copy and options (below).
- Save.
Widgets you created before this default changed keep whatever setting they had.
Pricing
Conversion Toolkit is free to install. Captured leads are billed per lead to your HighLevel wallet, and you only pay for leads that land in your CRM.
| Counts as a lead | Doesn’t count |
|---|---|
| A visitor submits the form and a contact is created or updated in your CRM | The same submission sent twice (a double-click or a retry) |
| Spam caught by the form’s bot checks, or an invalid email | |
| The prize or result attached to the contact after the email (part of the same lead) | |
| Widgets with lead capture switched off. They work normally and never ask for an email |
The gate fields
| Field | What it’s for |
|---|---|
| Form headline | The promise above the form — e.g. “Get your full results” |
| Form subline | A supporting line under the headline |
| Submit button label | The action — e.g. “Send my results” |
| Also ask for a name | Adds an optional name field (more friction, richer contact) |
| Also ask for a phone number | Adds an optional phone field |
| Consent line | Fine print shown under the form (for compliance) |
| Extra tags (comma-separated) | Your own tags added to every lead — this is what you trigger workflows on |
| Open the URL after lead capture | Send them to a URL once they submit |
What happens next
Capturing the lead is step one. The real power is what your CRM does with it:
- Tags & custom fields → — exactly what lands on the contact.
- Workflows & email campaigns → — fire automations off those tags.
- Bucketing & segmentation → — route different leads down different paths.